A ToolWindow is a container control which can be docked, floating, auto-hide, or MDI.
In order to begin, it is important to first have a brief explanation of the DockHost and ClientHost. The dock-host is the control in which tool windows can be docked, while the client-host (which is optional) is the control around which tool windows can be docked. Both the dock-host and client-host are managed by a DockLayoutManager (see Dock-layout Manager).
Creating ToolWindows
A tool window can be created by creating a control that derives from the ToolWindow class (which in turn derives from UserControl), or create or use a control and create a tool window around it. If the tool window is to contain a single control (e.g., a property grid), then it is easier to just create a tool window around the property grid control (see Example 1). It is also possible with this option to design a UserControl or any other control that contains multiple child controls and create a tool window around it.
If the option to derive from the ToolWindow class is used, then a new class must be created that derives from the ToolWindow class. Because the ToolWindow class derives from the UserControl class, the appearance of the tool window will be designable in the same manner as a UseControl. For this option, the best course of action is to add a class that derives from UserControl to your project and change the parent class from UserControl to ToolWindow.
Each tool window must have a unique key which can later be used to access it in its containing collection. When creating a tool window by changing the derivation from UserControl to ToolWindow, the Key property must be set either in the designer or in the constructor. When creating a tool window from scratch, the base's constructor must be called or the Key property set in the constructor.
The text displayed in a tool window's caption is defined by the Text property, while its image (ideally 16 x 16 pixels in size) is defined by the Image property. A tool window's text is always displayed in the caption and will also be displayed in its associated tab when the tool window is minimized in the AutoHideFrame or grouped. The image is only displayed in a tool window's associated tab.
Lifecycle and Visibility
From the moment a tool window is created, it will always exist. If a tool window is closed using the "hide" button (![]() ), it is not disposed of but rather hidden. Any tool window can be restored by setting its Visible property true. To hide a tool window programmatically, its Visible property must be set to false. To prevent tool windows from being hidden, the dock-layout manager's AllowHide property can be set to false.
), it is not disposed of but rather hidden. Any tool window can be restored by setting its Visible property true. To hide a tool window programmatically, its Visible property must be set to false. To prevent tool windows from being hidden, the dock-layout manager's AllowHide property can be set to false.
A tool window can be "activated" using its Activate method. If a tool window is activated using the Activate method, it will be made visible, it will get the focus, and it will be brought to the front. The active tool window can be retrieved via the dock-layout manager's ActiveToolWindow property.
Grouped ToolWindows
Tool Windows are considered to be grouped when their associated tabs are displayed (see Figure 1).
The ToolWindowGroup class exposes various properties and methods for accessing and handling groups of tool windows. Each tool window—even those that are not grouped—have a ParentGroup property that provides access to its container (ToolWindowGroup). The ParentGroup property provides access to each tool window's sibling ToolWindows and identifies the tool window within the group that is currently selected via the SelectedToolWindow property. Using the State property, the state of the group of tool windows can be accessed and modified. The ParentGroup property of a tool window will never be null (Nothing in Visual Basic).
To dock a group of tool windows, the DockTo method of the parent group of any one of the tool windows in the group must be used. If, rather than using the DockTo method, the parent group's State property is changed to Docked, each tool window in the group will return to its own last known docked location. If a tool window had never previously been docked, it will be docked to the left of the DockHost. Keep in mind that if a tool window is docked within a floating tool window, then its state is considered to be floating and not docked.
To add one or more tool windows to a specified group, each tool window's DockTo method—or the parent group's DockTo method—can be used with one of the tool windows in the group as the dock target and the DockPosition of a group. The new tool window will be added after the tool window that is specified as the dock target. The position of a tool window within a group can be changed using the parent group's SetChildToolWindowIndex method.
Every time the state, visibility, or location of a tool window is changed, its parent group is also modified. It is required to always access a tool-window group via the ParentGroup property and to never cache this property value.
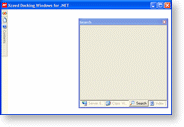
Figure 1: Grouped tool windows
Tabstrip Appearance
When tool windows are grouped, their associated tabs are displayed in a tabstrip. Each group of tool windows will have its own tabstrip; however, they will all have the same appearance (see Figure 2).
The appearance of the tabstrips and the tabs that they contain when tool windows are grouped is determined by the dock-layout manager's TabStripAppearance property (see Example 2). The background color of the tabstrip is determined by the BackColor property, while the colors of the background, foreground, and borders of the tabs contained in the tabstrip are defined by the TabBackColor, TabForeColor, and TabBorderColor properties. The background and foreground colors of the selected tab can be modified using the SelectedTabBackColor and SelectedTabForeColor properties. The font of the tabs contained in the tabstrip can be modified via the TabFont and SelectedTabFont properties (see Figure 3).
Caption Appearance
The appearance of docked tool-window captions is determined by the dock-layout manager's CaptionAppearance property (see Example 3). The color of the active tool window's background, foreground, and border is determined by the BackColor, ForeColor , and BorderColor properties while the font is determined by the value of the Font property. The InactiveBackColor , InactiveForeColor , InactiveBorderColor , and InactiveFont properties define the same values for the inactive tool windows. The height of the captions is determined by the Height property (see Figure 4).
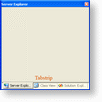 Figure 2: Tool-window group tabstrip |
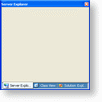 Figure 3: Tabstrip appearance |
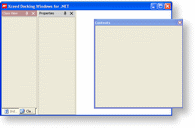 Figure 4: Caption appearance |
Size and Resizing
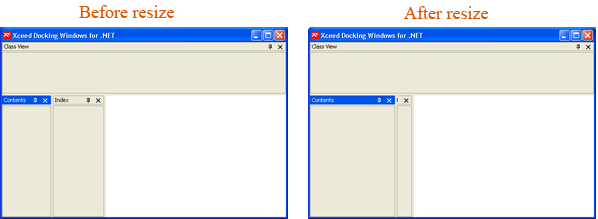
The size of a tool window is determined by its Size property (or Width and Height properties). When a tool window is resized, the size of the immediately adjoining tool windows can consequently be modified if they are in the same "line". For example, if 2 tool windows are docked, one beside the other, to the left of the ClientHost and the width of the first tool window is increased by 50 pixels, the width of the second tool window will be decreased by 50 pixels (see Figure 5).
Examples
Example 1: Creating a tool window
The following example demonstrates how to create a ToolWindow around a PropertyGrid.
| VB.NET |  Copy Code Copy Code |
|---|---|
|
| |
| C# |  Copy Code Copy Code |
|---|---|
|
| |
Example 2: Changing the tabstrip appearance
| VB.NET |  Copy Code Copy Code |
|---|---|
m_manager.TabStripAppearance.BackColor = Color.LightSteelBlue | |
| C# |  Copy Code Copy Code |
|---|---|
m_manager.TabStripAppearance.BackColor = Color.LightSteelBlue; | |
Example 3: Changing the caption appearance
The following code demonstrates how to change the appearance of the docked tool windows captions.
| VB.NET |  Copy Code Copy Code |
|---|---|
m_manager.CaptionAppearance.BackColor = Color.RosyBrown | |
| C# |  Copy Code Copy Code |
|---|---|
m_manager.CaptionAppearance.BackColor = Color.RosyBrown; | |