One of the most powerful features of the control's rendering engine is the ability to seamlessly integrate image filters (or per pixel operations) with all elements that have an associated FillEffect object (practically all objects in the control). This can greatly increase the visual quality of the generated image and is a must-have feature for applications requiring high presentation quality. There is a trade-off, however, in terms of speed: image filters, albeit optimized, are computationally expensive. The speed is directly linked to the size of the processed image. Therefore, it’s recommended to apply image filters on smaller objects.
Basic Terminology
This paragraph will give you a basic idea of how image filters work internally in order to better understand the settings exposed by each filter.
The core of image filter processing is the convolution filter. The idea behind convolution is that each pixel in the image is converted by using a 2D matrix, where the center matrix value represents the pixel that is currently being processed and the values that surround it represent how the neighboring pixels affect the value of the center pixel in the resulting image. For example, consider the following matrix:
| 0 | 0 | 0 |
| 0 | 1 | 0 |
| 0 | 0 | 0 |
This is called an identity matrix, because it does not change the image, and is also said to be normalized because the sum of its elements is 1. The identity matrix is the simplest convolution kernel. Larger convolution kernels are more computationally expensive to process because each pixel has to be weighted against more pixels.
For example, a 3x3 convolution kernel will require roughly 10 computations (9 for processing each neighboring pixel value and adding it to the total sum, plus 1 for dividing the result by the number of cells in the matrix). In contrast, a 5x5 kernel will require 26 computations. It is therefore recommended to set smaller values to the properties of the image filters, which reflect the size of the kernel (such as Size in the BlurFilter object, or BevelDepth in the LightingFilter object).
Another common term used in image processing is image channel. An image can be separated into several planes corresponding to the color components of each pixel color. The rendering engine behind the image filters uses 4 image channels–-one each for the alpha, the red, the green and the blue components of the image. Now that the basics have been presented, let's take a look at the image filters supported by the component.
Blur Filter
The blur filter is a simple filter that applies a blur convolution kernel on the alpha channel of the rasterized image. This results in blurred edges of the processed image.
You create a blur filter by instantiating an object of type BlurFilter and then adding it to the ImageFiltersCollection of the FillEffect object:
| VB.NET | |
|---|---|
| |
| C# | |
|---|---|
| |
This will create a blur filter with default properties.
The most important property of the blur filter is the AlphaChannelOnly property, which controls whether or not the filter will act on the alpha channel or the RGBA channels of the image. The default value of this property is false, but you can set it to true if you intend to blur black images or the size of the blur filter kernel is small.
In the next code snippet, the Type and Size properties are used to create the convolution matrix (kernel) and define its size, respectively. The following code creates a 10x10 blur filter with Gaussian convolution:
| VB.NET | |
|---|---|
| |
| C# | |
|---|---|
| |
This code means that pixels at a distance of up to 10 pixels will be blurred using a Gaussian distribution function.
Furthermore, you can control whether the filter will blur the top, left, bottom or right side of the image using the BlurTop, BlurLeft, BlurBottom and BlurRight properties of the BlurFilter object.
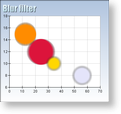
The following image shows several bubbles rendered using a blur filter with different settings:
The first bubble is generated with a blur filter whose BlurLeft and BlurRight properties are set to false.
The second bubble is generated with a blur filter whose BlurTop and BlurBottom properties are aset to false.
Glow filter
The glow filter is a variation of the blur filter, which allows you to add blurred edges with controlled color to the shape borders.
You create a glow filter by instantiating an object of type GlowFilter:
| VB.NET | |
|---|---|
| |
| C# | |
|---|---|
| |
There are two types of glow: inner and outer. The inner glow applies a blurred glow color to the borders of the image from within the image, whereas the outer glow does the same but on the outer side.
To change the glow type you must modify the GlowType property of the GlowFilter object, which accepts values from the GlowType enumeration:
| VB.NET | |
|---|---|
glowFilter.Type = GlowType.Inner | |
| C# | |
|---|---|
glowFilter.Type = GlowType.Inner; | |
To modify the glow color, you must use the glow filter's Color property, for example:
| VB.NET | |
|---|---|
glowFilter.Color = Color.Green | |
| C# | |
|---|---|
glowFilter.Color = Color.Green; | |
The Depth and BlurType properties control the blur applied on the glow color before combined with the original image:
| VB.NET | |
|---|---|
| |
| C# | |
|---|---|
| |
Finally, you can control the opacity of the original image with the OriginalOpacity property, which accepts values in the range [0, 100]. A value of 0 for this property means complete transparency for the original image, whereas a value of 100 stands for complete opacity.
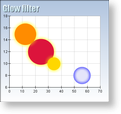
The following image shows the glow filter in action:
The first three bubbles use an outer glow filter whose glow color is set to yellow. The blue bubble uses an inner glow filter with a blue color.
Bevel and Emboss filter
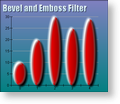
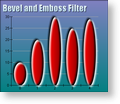
The bevel and emboss filter applies a bevel and emboss effect to the image. This effect works by first creating two offset and blurred images from the original one, but painted in different colors (highlight and shadow color) and then combining them with the original image. The different types of the bevel and emboss filter define how these images are combined.
You create a bevel and emboss filter by creating an instance of the BevelAndEmbossFilter filter object:
| VB.NET | |
|---|---|
| |
| C# | |
|---|---|
| |
Then you can modify the type of the bevel and emboss by changing the BevelType property, which accepts values from the BevelType enumeration:
| Bevel type | Description |
|---|---|
| Inner | Only pixels inside the original image are modified, by adding the contribution generated from the highlight and shadow images to the original. |
| Outer | Only pixels that lay outside the original image are modified, by adding the contribution from the highlight and shadow images bit leaving the original image intact. |
| Emboss | Pixels that lay inside and outside the image are modified. If the pixel is inside the original image, the contribution of the highlight and shadow images are added to the original pixel. If the pixel is outside the original image, the contribution from the highlight and shadow images is written to the resulting image. |
| PillowEmboss | Pixels that lay inside and outside the image are modified. If the pixel is inside the original image, the contribution of the highlight and shadow images are added to the original pixel. If the pixel is outside the original image, the contribution from the inverted highlight and inverted shadow images is written to the resulting image. |
The highlight and shadow colors of the derived images can be controlled by using the LightColor and ShadowColor properties of the BevelAndEmbossFilter object:
| VB.NET | |
|---|---|
| |
| C# | |
|---|---|
| |
Furthermore, the type and depth of the blur effect applied to the highlight and shadow images can also be controlled by using the BlurType and Soften properties. The first one controls the color distribution function, and the second one the size of the blur kernel used to convolve the original image in pixels.
Finally, you can tell the filter how much of the original image should be displayed by using the OriginalOpacity property, which accepts values in the range [0, 100], where 0 stands for completely transparent and 100 means completely opaque. The default value of the property is 100.
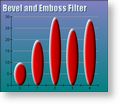
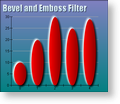
The following table shows the different types of bevel and emboss:
Lighting Filter
The lighting filter is an advanced type of filter that can emulate the lighting effect produced by two types of light sources: Positional and Directional.
You can think of Positional lighting as the light produced by a light bulb lit in a room where objects are close to the light source; light rays therefore fall at different angles on the objects.
Directional lighting on the other hand emulates the light produced by light sources infinitely far away from the object (like the Sun); all light rays are therefore parallel to each other.
You create a lighting filter by creating an instance of the LightingFilter object:
| VB.NET | |
|---|---|
| |
| C# | |
|---|---|
| |
The LightSourceType property indicates the type of lighting to emulate. The default value is LightSourceType.Directional, but you can change this to LightSourceType.Positional at any time:
| VB.NET | |
|---|---|
lightingFilter.LightSourceType = LightSourceType.Positional | |
| C# | |
|---|---|
lightingFilter.LightSourceType = LightSourceType.Positional; | |
The Position property of the lighting filter controls where the light comes from.
With a Directional light source, this property defines a direction vector. A value of (0, 0, 1) means that the light rays are falling squarely on the surface.
With a Positional light source, this property defines the position of the light source relative to the object being lit. A value of (0, 0, 10) means that the light source is in front of the object. Values greater than 0 for the x dimension will move the light source to the right. Values greater than 0 for the y dimension will move the light source to the top.
To control the color of the light emitted from the light source, you need to touch the DiffuseColor and SpecularColor properties of the LightingFilter object. The following code for example sets the diffuse color to Yellow and turns off the specular color contribution:
| VB.NET | |
|---|---|
| |
| C# | |
|---|---|
| |
At this point you may be wondering how the control is able to create a surface to light when the object is specified in 2D. The answer is that it uses the alpha channel of the image to assign different Z values to each pixel. To soften this, you might consider using the BlurType and BevelDepth parameters that control the type of blur to use on the alpha channel before applying the lighting filter on the image:
| VB.NET | |
|---|---|
| |
| C# | |
|---|---|
| |
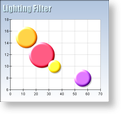
Finally, let's take a look at a couple of screenshots showing how the lighting filter works in practice. The following image illustrates Directional lighting:
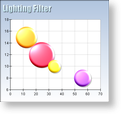
The following image illustrates Positional lighting:
See Also
FillEffect | BlurFilter | GlowFilter | BevelAndEmbossFilter | LightingFilter
